Installing a toilet, basin, shower, or bidet in China demands more than practical skill. It requires careful diagnosis, suitable materials, and respect for local standards.
The World Health Organization and UNICEF’s 2023 Joint Monitoring Programme reported that 3.5 billion people lacked safely managed sanitation in 2022. That figure gives installation quality wider importance. A loose connector can waste water, damage cabinetry, and create hidden moisture behind tiled walls. The U.S. Environmental Protection Agency’s WaterSense programme estimates that household leaks can waste more than 9,400 gallons of water annually. Small faults matter.
This Sanitary Ware Installation Troubleshooting Guide focuses on common site failures. It examines uneven floors, incorrect pipe gradients, weak silicone joints, low water pressure, drainage odours, and concealed leaks. China’s GB 18145 requirements for ceramic sanitary ware also remind installers to check product performance, not appearance alone. A glossy surface cannot compensate for a poorly aligned waste outlet.
Mike Holmes, a widely recognised renovation expert, uses a simple rule: “Make it right.” The principle fits sanitary ware installation precisely. Measure twice. Test every joint. Inspect the seal after use.
Still, no guide replaces field judgement. Building tolerances vary. Product instructions can be unclear. Some failures appear only after several days of temperature changes and repeated flushing. That is where experience becomes valuable. This guide connects technical checks with visible evidence, such as a damp skirting board, a rocking toilet base, or a slow-draining basin. It also acknowledges an uncomfortable truth: rushed installation often looks acceptable until the first complaint arrives.
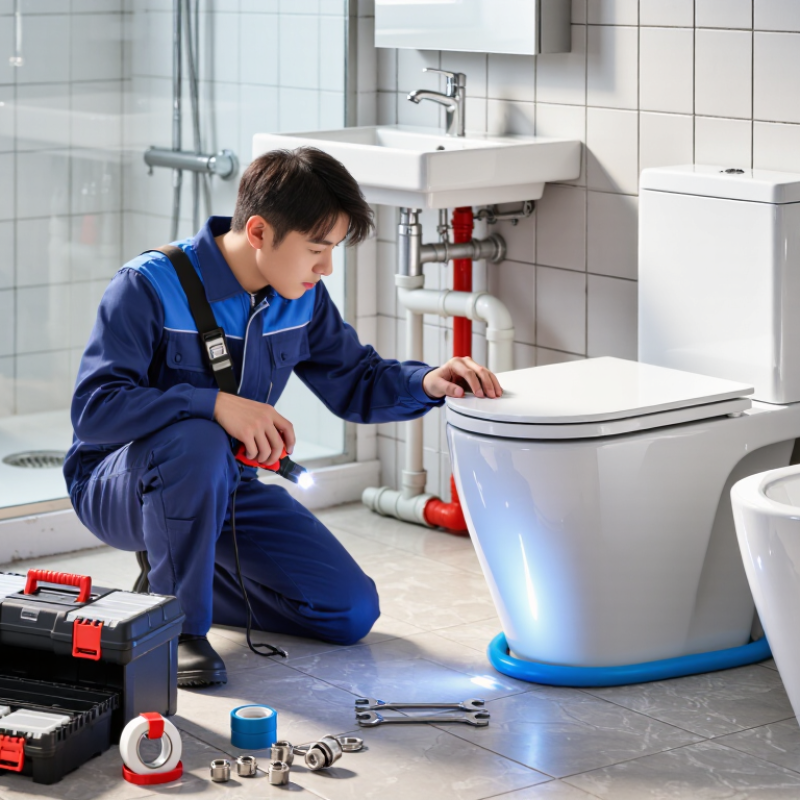
China Top Sanitary Ware Installation Troubleshooting Guide
Understanding China Sanitary Ware Standards and Installation Requirements
China’s sanitary ware market is becoming more technical, not merely larger. The WHO and UNICEF JMP 2023 report estimated that 3.5 billion people lacked safely managed sanitation in 2022. Reliable installation therefore affects hygiene, water use, and long-term maintenance. In China, ceramic fixtures should be checked against GB 6952-2015. Toilet water-efficiency performance follows GB 25502-2017. Building drainage work must also meet the mandatory GB 55020-2021 requirements.
On site, standards become practical measurements. Confirm the toilet’s rough-in distance before drilling. Check the floor level with a spirit level. Test the inlet pressure and inspect every threaded joint for slow leaks. The drainage pipe needs stable support and suitable slope. A loose seal may remain invisible for days. Then it damages the floor or ceiling below. I have seen installations pass visual inspection but fail after repeated flushing. The mistake was simple: the outlet alignment was assumed, not measured.
Tips: Keep the product certificate and water-efficiency label. Record pipe sizes, wall distances, and test results. Do not overtighten ceramic connections. Porcelain can crack quietly. Recheck the flush, refill speed, and seal after 24 hours. A perfect drawing cannot correct an uneven floor.
Minimum recommended gradients for common gravity drainage pipe sizes
Insufficient drainage gradient can cause slow discharge, standing water, odor, and repeated blockage in toilets, basins, and floor drains. The chart presents commonly referenced minimum gradients for gravity drainage pipework used in building sanitary installations.
As a practical check, a DN50 pipe with a 2.5% gradient should fall approximately 25 mm per metre, while a DN110 pipe with a 1.2% gradient should fall approximately 12 mm per metre. Confirm the applicable project specification and current local code before installation.
Reference basis: commonly cited drainage gradient values from GB 50242-2002, Code for Acceptance of Construction Quality of Water Supply, Drainage and Heating Works.
A reliable installation starts with a clear work area. Remove stored items beneath the basin and protect nearby surfaces with thick towels. Shut off the water supply, then open the tap to release trapped pressure. Keep a bucket close. Small leaks can appear suddenly.
Prepare an adjustable wrench, basin wrench, screwdrivers, a level, measuring tape, flashlight, and clean cloths. Useful materials include approved washers, flexible supply hoses, drain fittings, wall anchors, and suitable sealant. Check every part before installation. A damaged washer can cause trouble after the work seems finished. Do not overtighten fittings, because excessive force may crack ceramic parts or strip threads.
Inspect the wall, floor, and existing pipework carefully. The surface must be stable, dry, and reasonably level. Confirm the drain position and hot and cold connections against the product instructions. Local plumbing requirements may also affect clearances and connection methods. I once trusted an apparently level cabinet and skipped a second measurement. The basin sat slightly unevenly, so I had to loosen the fittings and reset it. That delay was avoidable. Dry-fit the components before applying sealant, and leave enough space to reach shutoff valves later. Take a photo of hidden connections before closing the cabinet. It helps when troubleshooting begins.
A reliable sanitary installation starts with the wall, floor, and pipe locations. For a toilet, confirm the drain centerline and rough-in distance before opening the seal. Set the pan level, press the gasket evenly, and tighten bolts only until secure. Over-tightening can crack ceramic. Connect the supply line, open the valve slowly, and inspect every joint after three flushes. Measure twice. Keep it level.
For a basin, install the waste trap with a visible service gap and test drainage with a full bowl of water. A slight slope prevents standing water. Mount the shower valve at the finished-wall depth, not the unfinished depth. Seal threaded connections with an approved method, then check hot and cold orientation. For faucets, clean pipe ends, fit new washers, and avoid twisting flexible hoses. A small drip often comes from a displaced washer, not a defective faucet.
The U.S. EPA WaterSense specifications set efficient benchmarks: toilets use no more than 1.28 gallons per flush, faucets 1.5 gallons per minute, and showerheads 2.0 gallons per minute. These figures help identify unusual flow during commissioning. However, pressure varies between buildings, especially in high-rise apartments. A pressure gauge is more dependable than guesswork. My own inspection habit still fails when wall finishes hide a joint, so I photograph connections before closing the surface and retest them the next day.
Leaks often begin as a small, clear bead beneath a supply connection or waste trap. Dry the area completely, then wrap tissue around each joint. The first damp mark usually identifies the problem. Tighten compression fittings gently; overtightening can distort seals and create another leak. For a toilet or basin, check the fixing points and floor contact. A loose fixture may move slightly before water damage becomes visible. Stop there. Do not use the fixture until the connection is secure.
Blockages usually show through slow draining, gurgling, or water rising around the drain opening. Remove the visible cover and clear hair, soap residue, and sediment carefully. A plunger works best when enough water covers its rubber cup. Avoid forcing a rigid object deep into the pipe, since it may damage fittings or compact the obstruction. Poor drainage can also result from an incorrectly sloped waste pipe. This is easy to miss.
After cleaning, run water for several minutes and inspect the trap, wall connection, and surrounding floor. Listen for repeated bubbling. If the flow remains weak, the blockage may be farther inside the drainage line. I have seen installers blame the drain when a loose mounting nut caused the real issue. That mistake is understandable, but a second inspection matters. Persistent leaks, hidden pipe damage, or unstable wall-hung fixtures require a qualified plumber and appropriate isolation of the water supply.
| System or Fixture | Observed Symptom | Most Likely Causes | Diagnostic Checks | Recommended Corrective Action | Useful Measurements or Limits | Priority | Prevention During Installation |
|---|---|---|---|---|---|---|---|
| Toilet | Water leaks continuously into the bowl after flushing. | Worn flush valve seal, incorrect chain or button adjustment, mineral deposits on the valve seat, or an excessively high tank water level. | Remove the tank lid and check whether water is flowing over the overflow tube. Add a few drops of food coloring to the tank and wait approximately 15 minutes without flushing; color appearing in the bowl indicates a tank-to-bowl leak. | Clean or replace the flush valve seal, adjust the actuator chain or push button, and set the fill valve so the water stops below the overflow opening. | The tank water level should remain below the overflow tube opening. A food-color test should show no color transfer after 15 minutes. | Medium | Keep the valve seat clean, avoid overtightening plastic components, and verify the fill and flush mechanisms before closing the cistern. |
| Toilet | Water appears around the base after flushing. | Damaged sealing ring, loose floor fasteners, an uneven floor, an incorrectly aligned outlet, or condensation on the tank or supply line. | Dry the floor completely, place tissue around the base, and flush several times. Check the supply connection and tank bolts separately to identify the leak source. | Replace the toilet outlet seal if the leak occurs only during flushing. Realign the bowl, tighten fasteners evenly without cracking the ceramic, and repair the floor or flange support when necessary. | The fixture should sit firmly without rocking. Fasteners should be snug rather than forcibly tightened; ceramic can crack under excessive point loading. | High | Confirm outlet alignment, clean and dry sealing surfaces, use a new suitable seal, and perform a repeated flush test before applying any finishing sealant. |
| Toilet | Flush is weak, water swirls, or the bowl drains slowly. | Partial blockage in the trap or branch drain, blocked rim or jet openings, low tank water level, or insufficient venting. | Check the tank level, inspect visible rim openings, use a toilet plunger, and compare performance with nearby fixtures. If other fixtures gurgle or drain slowly, inspect the branch drain and vent. | Clear the trap with a flange plunger or toilet auger. Clean mineral deposits from accessible water openings and investigate the drain or vent if the problem affects multiple fixtures. | Use a plunger with a tight seal and avoid repeated chemical drain-cleaner use in toilets, as it may damage seals and create a handling hazard. | Medium | Prevent wipes, sanitary products, hard objects, and excessive paper from entering the toilet. Confirm the drain path is clear before final connection. |
| Basin or Sink | Water drains slowly or stands in the basin. | Hair and soap buildup in the stopper or trap, a partially blocked branch pipe, inadequate pipe slope, or a blocked overflow passage. | Remove and clean the stopper. Run water into a bucket through the trap, then inspect the trap and branch pipe. Check whether nearby fixtures show the same drainage problem. | Clean the stopper and trap, use a hand auger for the branch pipe, and correct pipe alignment or slope where installation conditions are responsible. | Drainage pipes should maintain a continuous fall toward the waste connection; a commonly used planning value for small horizontal waste pipes is about 2% slope, subject to local code. | Medium | Install a removable strainer, keep the trap accessible for maintenance, and avoid sharp changes in direction or unnecessary long horizontal runs. |
| Basin or Sink | Leak occurs beneath the basin or at the waste connection. | Loose slip nut, displaced washer, cross-threaded fitting, damaged gasket, or misaligned tailpiece. | Dry all components and run water while observing each joint. Check whether the leak occurs from the threaded joint, washer face, or drain flange. | Disassemble and clean the joint, install the correct washer in the correct orientation, align the pipes, and hand-tighten before making a small additional adjustment with a tool. | Plastic waste fittings generally seal through correctly seated washers rather than excessive thread force. Do not use excessive torque on plastic nuts. | Medium | Support the trap and tailpiece independently, avoid side loading, and test the connection with both a slow flow and a full basin discharge. |
| Shower or Floor Drain | Water pools around the drain or the shower empties slowly. | Hair or construction debris in the strainer or trap, insufficient floor gradient, a partially blocked waste pipe, or a displaced drain body. | Remove the strainer and inspect the trap. Pour a measured bucket of water onto different floor areas to observe the flow direction and identify low spots. | Remove debris, clean the trap, clear the waste pipe, and correct the floor or drain position if water remains outside the intended drainage area. | Wet-area floors should fall continuously toward the drain. The exact gradient depends on local code, tile format, accessibility requirements, and the drainage layout. | High | Protect open pipes from mortar and tile adhesive, verify the drain height before waterproofing, and perform a controlled water-flow test before tiling. |
| Shower or Floor Drain | Unpleasant sewer odor comes from the drain. | Dry or incorrectly installed trap, missing trap primer, poor venting, damaged seal, or biofilm and debris in the drain. | Pour water into the drain and observe whether the odor improves. Check that the trap retains water and inspect for loose components or visible gaps around the drain body. | Restore the trap water seal, clean the drain, repair damaged seals, and investigate venting or trap-primer requirements where the odor returns quickly. | A trap must retain a water seal; the required seal depth is governed by applicable plumbing regulations and the fixture design. | Medium | Install the correct trap, maintain access for cleaning, protect the trap from drying during long vacancies, and verify the drain assembly before concealment. |
| Faucet or Mixer | Water leaks from the spout, handle, flexible hose, or connection point. | Worn cartridge or valve seal, loose connection, damaged O-ring, incorrectly seated washer, or excessive water pressure. | Dry the faucet and observe the exact leak location with the handle open and closed. Check supply hoses and connections independently. | Replace the worn cartridge or seal, reseat the washer or O-ring, align the connection, and tighten according to the fitting instructions without twisting the hose. | Static water pressure should comply with local plumbing requirements. If pressure is unusually high, a pressure-reducing device may be required. | Medium | Flush supply lines before connecting the faucet, use clean sealing surfaces, avoid forcing threads, and provide isolation valves for future maintenance. |
| Faucet or Mixer | Flow is weak, uneven, or suddenly reduced. | Blocked aerator or inlet screen, partially closed isolation valve, kinked flexible hose, supply-line debris, or inadequate supply pressure. | Remove and clean the aerator, confirm both isolation valves are fully open, inspect hose routing, and compare hot and cold flow separately. | Clean the aerator and inlet screens, straighten or replace a kinked hose, flush the supply line, and inspect the valve or building supply if low flow remains. | Flow rate depends on fixture design and pressure. Compare actual performance with the fixture’s technical specification rather than using one universal flow value. | Low | Flush pipes before final connection, install strainers where appropriate, and avoid bending flexible hoses below their minimum recommended radius. |
| Wall-Hung Basin or Toilet | Fixture moves, rocks, or produces creaking sounds during use. | Loose mounting hardware, inadequate wall reinforcement, uneven bracket support, incorrect anchor type, or a gap between the fixture and finished wall. | Check movement at the fixture edges, inspect visible fasteners, and verify whether the supporting wall is solid enough for the fixture load. Do not rely on sealant as structural support. | Remove the fixture if necessary, repair or reinforce the substrate, replace unsuitable anchors, level the bracket, and retighten hardware evenly. | Mounting hardware and substrate must be rated for the fixture’s operating load. Follow the installation instructions and applicable building requirements. | High | Locate structural support before drilling, use anchors suitable for the wall material, verify bracket level, and conduct a stability check before final sealing. |
| Pedestal Basin or Floor-Mounted Fixture | Fixture rocks or separates from the floor or wall. | Uneven floor, missing fixing points, loose screws, incorrect leveling, or unsupported pipework exerting force on the fixture. | Check the floor contact area, inspect fixing points, and confirm that the waste and supply pipes align without pushing the fixture sideways. | Level the support surface, install suitable fixings, support pipework independently, and use a compatible sanitary-grade sealant only after the fixture is mechanically stable. | Sealant should prevent water ingress; it should not replace mechanical fasteners or compensate for a substantially uneven floor. | Medium | Level the floor before installation, pre-position pipe connections, avoid forced alignment, and allow sealant to cure according to its technical instructions. |
| Supply and Waste Pipework | Leak appears only when water is discharged quickly or several fixtures operate together. | Poorly supported joints, incomplete solvent-weld or compression connection, excessive pipe movement, blocked branch pipe, or undersized drainage arrangement. | Run the affected fixtures at different flow rates, inspect joints while the system is under normal operating conditions, and check whether the leak is upstream or downstream of the fixture trap. | Rebuild the faulty joint using compatible components, add pipe supports, clear the obstruction, and have the drainage design reviewed if capacity or venting is inadequate. | Pipe sizes, support spacing, venting, and drainage capacity must comply with local plumbing codes and the selected fixture requirements. | High | Use compatible materials, keep joints clean and properly prepared, support pipes to prevent strain, and pressure-test or flow-test concealed work before closing walls or floors. |
Testing a completed sanitary ware installation should feel practical, not ceremonial. Run cold and warm water through every fixture for several minutes. Watch supply joints, valve connections, and drain traps with a dry tissue. Leaks hide. Check toilet stability by applying gentle pressure from several directions. The bowl should not rock, shift, or creak. Flush repeatedly, then inspect the floor around the base and the ceiling below, if accessible. I have seen leaks appear only after the third flush.
Measure drainage performance with a full basin release, not a slow trickle. Water should clear without bubbling, foul odors, or rising levels. Listen closely. Unusual tapping may indicate movement, poor support, or trapped air. Confirm the shower slope directs water toward the drain, especially near corners and door seals. Use a flashlight to inspect silicone edges for gaps, peeling, or unfinished joins. Do not hide a problem with extra sealant. That shortcut often delays repair.
Preventive checks are simple, but they must be recorded. Note installation dates, shutoff locations, sealant condition, and any unusual sound or odor. Recheck exposed connections after 24 hours and again after one week. Cabinet interiors should remain completely dry. Clean strainers and drain covers regularly, while avoiding harsh chemicals that can damage seals or surfaces. Keep access clear. A beautiful finish is not useful if maintenance requires demolition. My own inspection routines have missed slow seepage before, especially beneath crowded cabinets. That mistake changed my practice: I now use tissue, light, and patience together.
Ceramic fixtures should be checked against GB 6952-2015. Water-efficiency performance follows GB 25502-2017. Drainage work must meet GB 55020-2021 requirements.
Measure the rough-in distance before drilling. Check the floor with a spirit level. Confirm outlet alignment, pipe size, and inlet pressure.Measure it.
Dry every connection completely. Wrap tissue around threaded joints and watch for the first damp mark. Recheck seals after 24 hours.Small leaks matter.
Outlet alignment may have been assumed instead of measured. Repeated flushing can expose weak seals, poor support, or uneven flooring.A perfect drawing is insufficient.
Tighten them gently until the connection is secure. Excessive force can distort seals and create another leak. Ceramic connections need special care.Porcelain may crack quietly.
Slow draining, gurgling, and rising water often indicate a blockage. Remove visible hair, soap residue, and sediment carefully.The cause is not always obvious.
Use a plunger when water covers its rubber cup. Avoid pushing rigid objects deeply into the pipe. They may damage fittings or compact debris.Be patient.
Run water for several minutes. Check the trap, wall connection, floor, and mounting points. Listen for repeated bubbling or weak flow.I might blame the drain too quickly.
Contact a qualified plumber for persistent leaks, hidden pipe damage, or unstable wall-hung fixtures. Isolate the water supply when appropriate.Do not keep using unsafe fixtures.
This Sanitary Ware Installation Troubleshooting Guide provides a practical overview of planning, installing, and checking common bathroom fixtures. It begins by explaining the importance of understanding applicable sanitary ware standards, connection requirements, measurements, and installation conditions. It also covers how to prepare suitable tools, sealing materials, pipes, drainage components, and a clean, level work area before installation. Clear step-by-step guidance is provided for toilets, basins, showers, and faucets, helping ensure secure connections, correct alignment, stable support, and effective water flow.
The guide also explains how to identify and resolve frequent problems, including leaks, blockages, slow drainage, loose fixtures, poor sealing, and incorrect pipe connections. After installation, users are encouraged to test water supply, drainage, flushing, sealing points, and fixture stability. Regular inspection, careful cleaning, and timely maintenance can help prevent recurring faults and extend the safe, reliable performance of bathroom installations.

CKY Home